Chocolate Dipped Cones
This post may contain affiliate links. Please see my disclosure policy for more information.
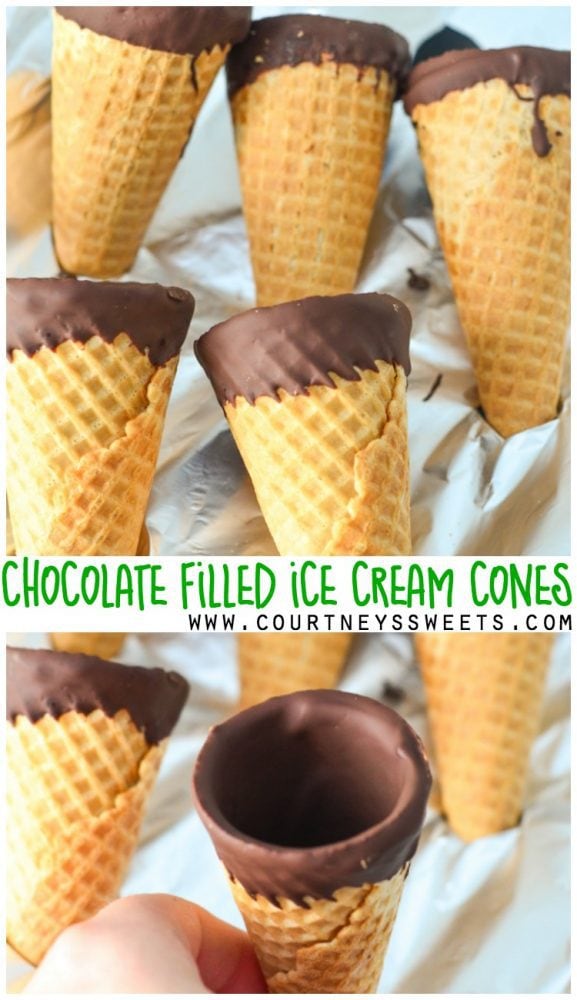
Learn how to make Chocolate Dipped Cones. Save money and make your own Chocolate Filled Ice Cream Cones just like storebought ones!

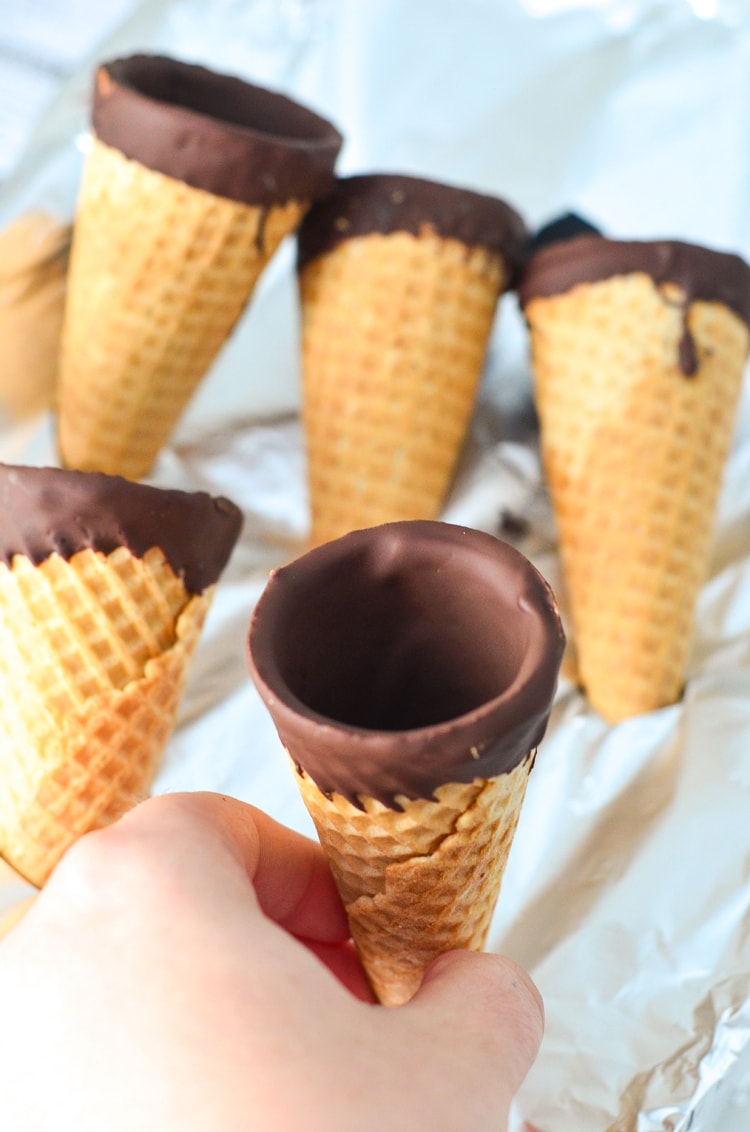
You can make delicious chocolate filled sugar cones or even waffle cones for storebought ice cream or even homemade ice cream. Such a simple recipe!! I use tinfoil to keep them standing, but you could easily use a small shot glass or even poke holes into a cardboard box.
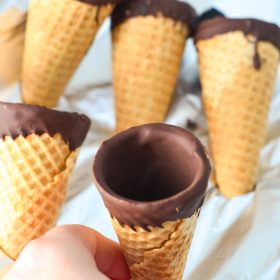
Everyone knows the best part of a chocolate filled ice cream cone is the bottom, am I right? Making them yourself you can control how much chocolate goes on the bottom! We also like to put a bit of chocolate on the outside of the cones and it really wows our guests. Our mini chef is a huge fan and often asks to just eat one of the chocolate cones without any ice cream in it, silly kiddo!
Want chocolate just on the top or for a special holiday theme? Check out our 4th of July Chocolate Dipped Cones.
Recipe ingredient notes
- Chocolate Chips
- Coconut Oil
- Sugar cones
Step-by-step instructions
For the full ingredient amount and full instructions on how to make chocolate dipped cones see the recipe card below.
- Line a baking sheet with aluminum foil on the top so it’s night and tight. Poke holes in the aluminum foil with the waffle cones with even spacing so they do not touch.
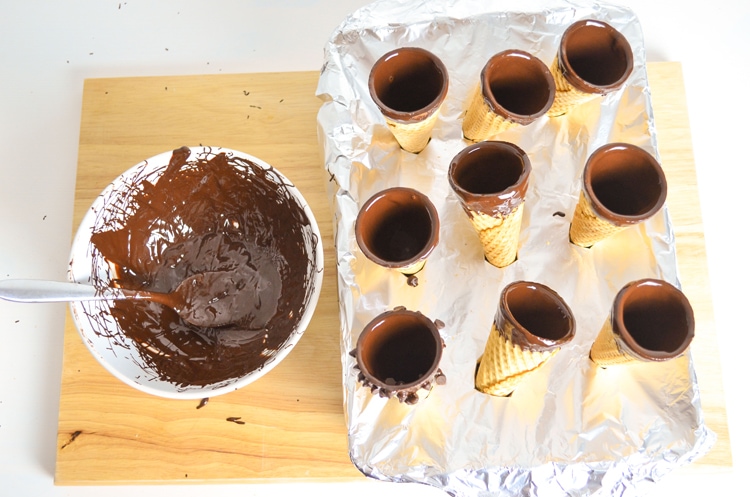
- Melt the chocolate along with the coconut oil over a double boiler and then pour it into the waffle cones.
- Once the chocolate is completely smooth and melted start filling the cones and drain out the excess.
- Repeat with the desired amount of cones until you’re finished.
Recipe tips and variations
- Our special tip is to use really good quality chocolate. When you use cheaper chocolate, you’ll notice the difference. Quality chocolate melts smoothly whereas lower quality chocolate can end up a bit gritty. Making your own Chocolate Filled Ice Cream Cones is a great way to fill the cones with whatever you want! You can make a simple vegan banana nice cream or go crazy with flavors if you want.
- For this, you can use any cone you’d like, but we prefer a simple sugar cone. You can even go crazy and add on sprinkles, crushed cookies, chocolate chunks, chocolate chips, or whatever you like to the chocolate on the outside of the cone to give it a little decoration and yumminess! You could even do sprinkles to match a themed party if you’re using them for entertaining! These would be perfect for an ice cream party!
How to serve
You can serve it with ice cream, whipped cream, berries, fresh fruit, candy, whatever you prefer!
Frequently asked questions
Yes, if you want to use candy melts you can. Alternatively, if you have a dairy allergy you can use your dairy-free white chocolate and use powdered food coloring to color the chocolate.
We store them on the counter in an air-tight container for about a week. If it’s warmer where you are we recommend storing it in the refrigerator or freezer. If your ice cream cone is filled you’ll need to refrigerate it if it’s something fresh, but if it’s frozen it will need to be in the freezer.
Yes! It will be a little different though as they can stand upright. You can pour in the chocolate, dump out the excess and allow it to harden before filling.
Try making our Chocolate Filled Ice Cream Cones and you’ll be surprised how quickly they set up. You can even put ice cream into them and save them in the freezer for another time, no need to eat them right away.


Chocolate Filled Ice Cream Cones
Ingredients
- 1 cup chocolate chips
- 1 tablespoon coconut oil
- 1 box sugar cones
Instructions
- Line a baking sheet with aluminum foil on top so it's tight fitting. Use the sugar cones to poke holes into the foil with even spacing so they do not touch.
- Fill a small saucepan with water, about a cup. Place the saucepan onto the burner and bring it up to a simmer. Place a glass bowl onto the saucepan and then pour in the chocolate chips and coconut oil. Mix the chocolate chunks often to help them melt.
- Once the chocolate is completely smooth and melted start filling the cones and drain out the excess.
- Repeat until all cones are finished and allow to harden in the fridge for at least 30 minutes before using.
Nutrition
So nice to have you here! Did you try this recipe? ⭐ ⭐ ⭐ ⭐ ⭐ Be sure to leave a recipe rating! Also, tag us @courtneyssweets #courtneyssweets on Instagram so we can share it!